In conclusion of Unit 67, I believe that I have efficiently and effectively carried out the task to a certain degree. Within this unit, I have learnt many new and different techniques allowing me to progress and actually become a better animator using the new skill I have picked up such as modelling, skinning, rigging and key-framing. Although that the end products created may seem quite simple themselves, I believe that I did a good enough job with presenting my work as I dedicated quite a lot of time into the project with the length-worthy tasks of key-framing and rendering the animation itself. I think that as I made more and more animations, Each one seemed to improve in some sort of way and I believe that if I were to repeat this task one again, I could do a better job as I have learned so many new things about the animating process.
Since animation is quite new to me, I think that I got the hang of the process fairly quickly as I found myself doing things much better than other things whilst actually animating. I think I was better at the actual animation process including things such as boning, skinning, rigging and key-framing. I feel like my animations were very fluent in the process but I think it was more of the smaller things that let me down, such as the model itself and lighting. The reason why I'm saying that I don't think my model was the greatest is because whenever I tried to move the model, the head would stretch so I was forced to keep my model within the center of the field which made animations such as my running and jumping animations seem much more bland than they could of been. I also couldn't create a lighting effective enough to make the area seem very bright and easy to see so I would like to improve or learn how to create better lighting in the next time that this opportunity comes around.
Tuesday, 16 May 2017
Production
How I Render.
- 60FPS.
- AVI JPEG
- 1920 x 1080 (100% Scale)
Key-framing.
(Select all bones in pose mode for each key-frame)
-Location
-Rotation
-Scaling
WALKING

Here, you can see how I evenly spread out each key-frame to make a fluent marching animation as I was able to simply copy and paste each key-frame that I had previously used. To get the different positions, I chose different bones around the body and rotated them in specific ways.

Here is a screenshot of the key-frames I used on the camera. I didn't use many because they were not really needed and the animation of the camera was fairly nice and smooth.

RUNNING
This video shows the project for my running cycle, including settings and the key-frames that I have used. As you can see, I had lots of inspiration from the Naruto run cycle as I think it looks very appealing and effective.

JUMPING

Here is a screenshot for the Jumping animation I have created. I wanted my model to have more of realistic effect whilst jumping and falling so I tried to move the arms and legs in the correct motion.
LUNGING

This is the image that inspired the pose of my Lunging animation. I struggled for a while to get a pose I was happy with but I think that the outcome of the pose was good for a first time.

Here you can see the key-frame of the actual lunging pose. I wanted to show the model lunging both slow and fast so I added the pose twice within the final animation.
SPINNING
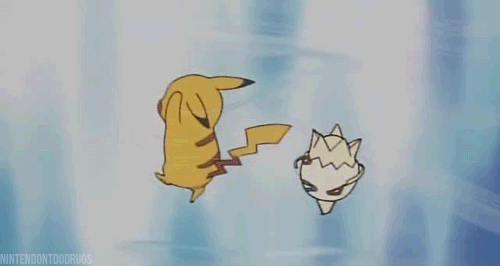
This is a GIF of the Pokemon Pikachu and Togepi happily spinning around. I would like to use this as a reference to mine because it looks quite appealing and I believe that the outcome of my animation could be quite effective.

I found it hard to get the right type of spinning pose because the model glitched out a large majority of the time so I was forced to keep the animation more simple but I think it looks quite good and I used the GIF for inspiration since I didn't really know any other way to get around it.
Legal and Ethical
problems avoided - copyright, PG13 environment no gore, blood, sex, nudity, violence etc.
because i used my own assets, i won't be sued because i haven't stolen from others/ asset store.
because i used my own assets, i won't be sued because i haven't stolen from others/ asset store.
Storyboard

Here is a quick storyboard I made to help me plan the positions that my Dada doll will make within the 5 different types of movement animations. I don't think that I really needed to add much detail to any of the drawings because I can simply use this as a guideline and produce the work using the stages that I have created with the storyboard. To create this, I used a free program called paint.net.
Puppet Rig
Bones

As you can see, I have added bones into my DADA styled doll. I did this by going to armature, adding a single bones and I extruded the bones in different direction where I think it needs them to be able to move free and fluently. After I was happy with the boning structure, I went into object mode, selected my merged doll and then the bone structure, press Ctrl+P and selected with automatic weights. Now, they are paired together so that when I am in the Pose mode, I can move the bones and then parts of the doll will move along with it.
Bugs

Here is one of the Major bugs that I noticed instantly when I moved the leg of the doll. As you can see, this is obviously not the way that I want the bone to work as I want the doll to move with the bone so now, I need to fix this by Rigging.

Here is the process I used to "Rig" my model so that each bone was more precise so that each body part moved in the exact way that I want it to. I make sure nothing in the model isn't selected by pressing A, and I have also gone into wire-frame mode so that parts within the model were easily selected and I could see which bits were and weren't selected. This process was quite fiddly but it worked out for the better since I was able to animate my doll with fluent movement.
Puppet Build

Here is the final result of the DADA styled doll that I had created using various shapes and techniques within Blender. I had gathered inspiration from the DADA art style and other DADA dolls, chose various body parts and used them to create my own and unique version of a DADA doll.
I created it with the position of a "T-Pose" so that it would make it easier for me to skin and rig the model in order to allow the doll to move freely so that I can create the animations that have been set within the task.
I used a colourful and repetitive colour scheme using a bright red and orange tone. I think that this looks quite effective as it makes my DADA doll stand out and the colours themselves mix very nicely together.
Here are some of the DADA dolls that I have used for inspiration. As you can see, My doll has some similar features when compared to these in areas of the body, such as the joints and the shape of the torso.


Subscribe to:
Comments (Atom)